Статья представляет собой руководство по выращиванию БОНСАЯ из перца. Но к сожалению она на английском языке, хотя по картинкам все понятно. Если будут энтузиасты на перевод статьи свяжитесь со мной! приятного просмотра. 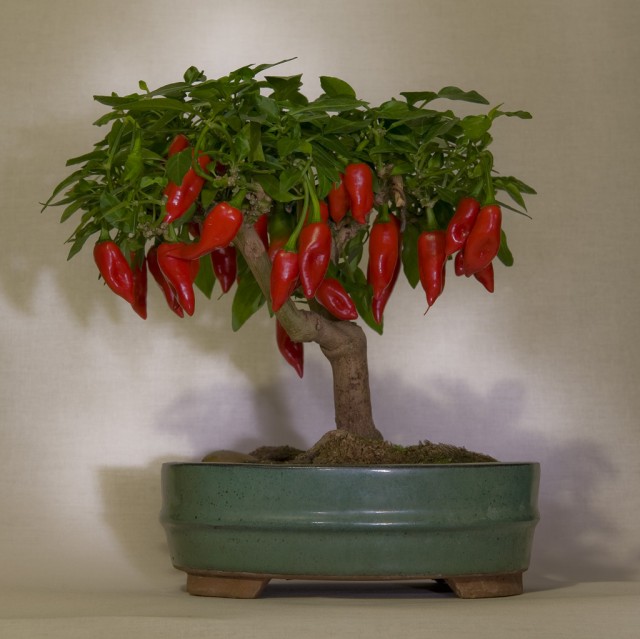
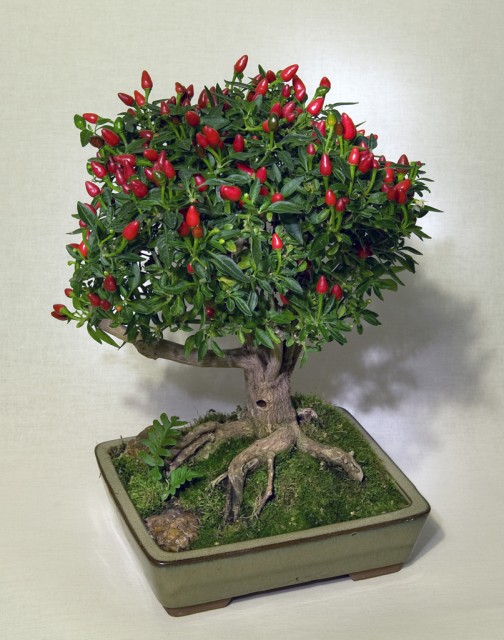
Dutch-Habanero F1 -bonchi.
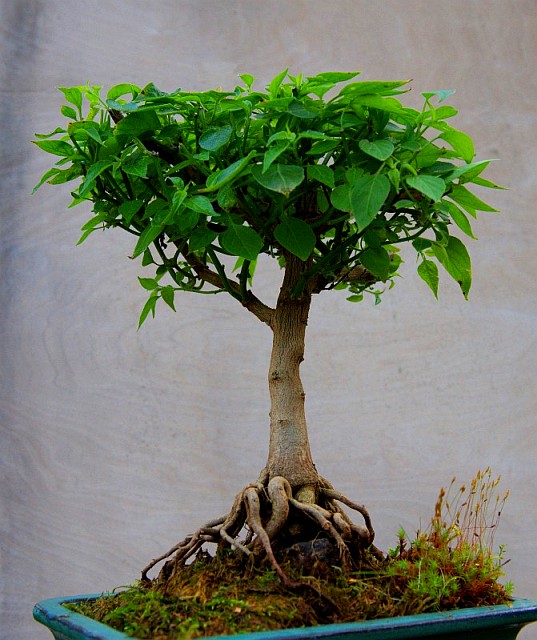
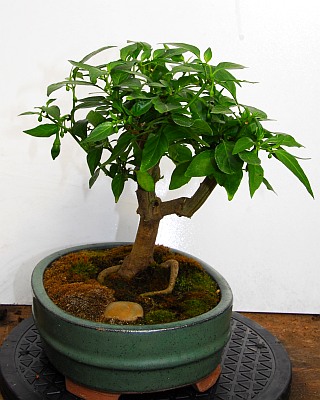
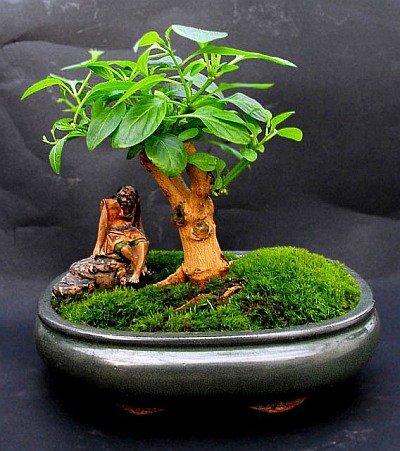
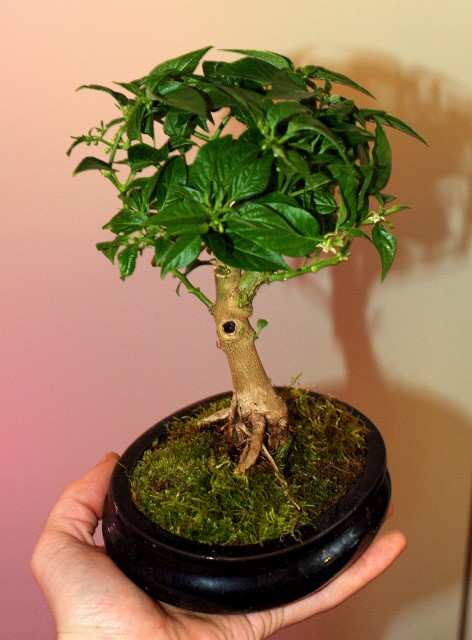
Cumari Pollux -bonchi.
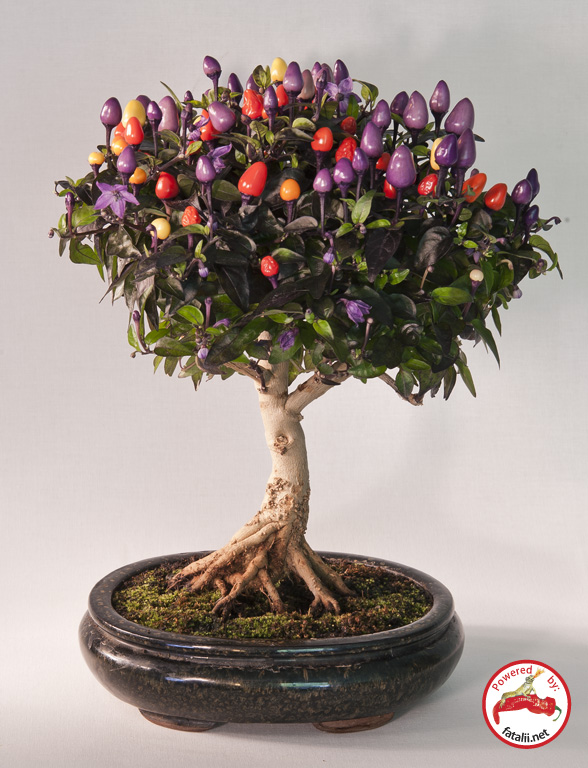
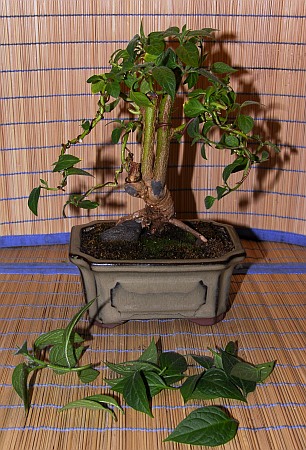
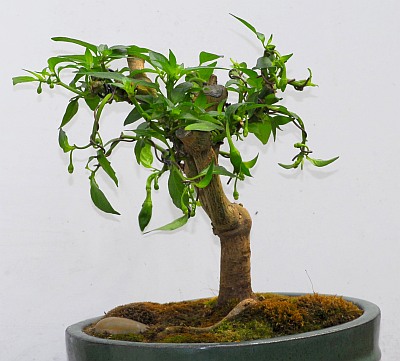
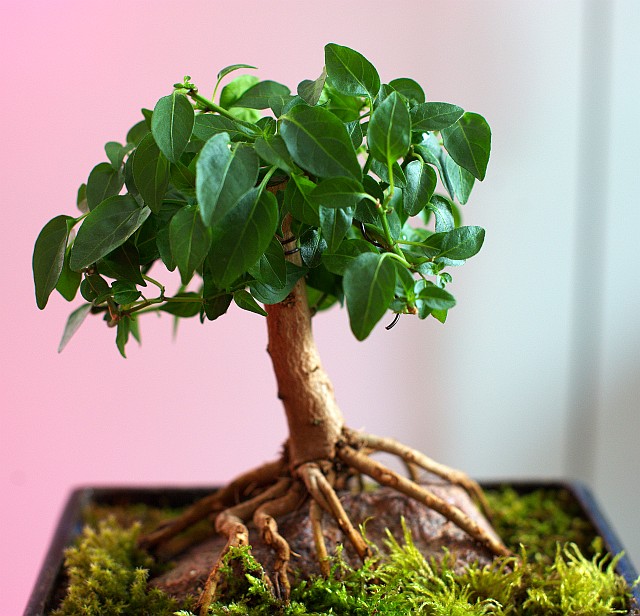
Bolivian Rainbow -bonchi.
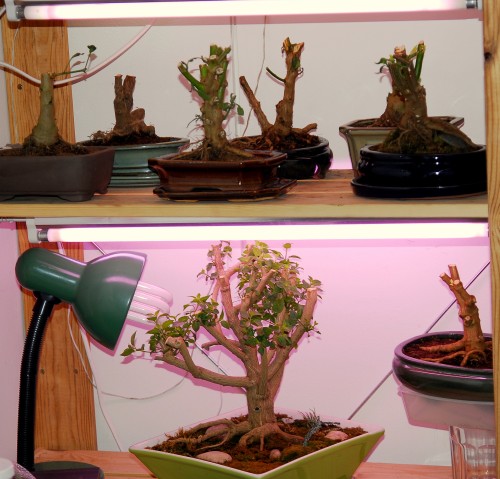
The picture below shows several Bonchi's growing their first leaves, right after cutting them down, yes they look ugly at this point, for a short while...
What can be more creative and versatile hobby and art than growing a chile pepper from a seed to a bonsai tree?
That's what you can call your own creation!
Use all techniques available, growing thick stems, bending branches, adding stones, moss etc. and of course, trimming roots, leaves and stems just the way you like them.
First, you might think that "It takes too long for my patience to do that!", but it really doesn't take much time with Capsicums... read on!
The best of all, you can choose ANY from thousands of different chile varieties to start your own chile bonsai project, truly from a seed!
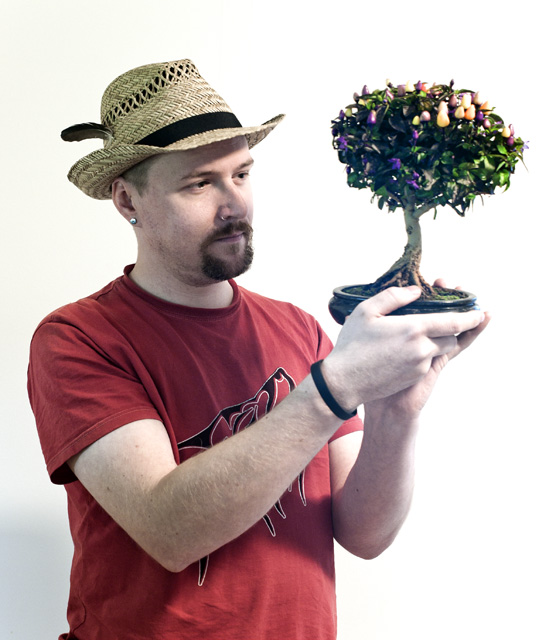
Bolivian Rainbow Bonchi "Bobo" and it's proud owner. 
Germinating chiles.
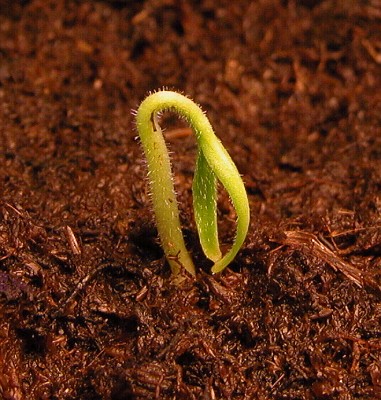
Seedling just germinated!
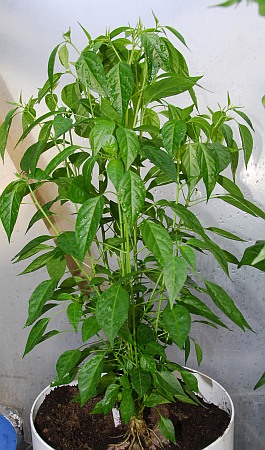
It doesn't matter if the plant you selected grows 4 meters tall in a large container...
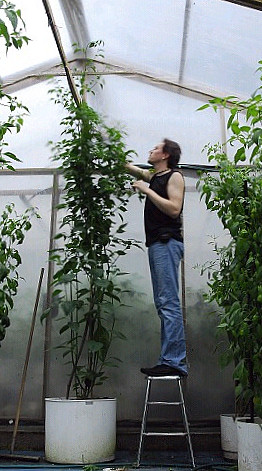
This plant actually reached 4 meters and yet it's a perfect base for a bonsai-chile!
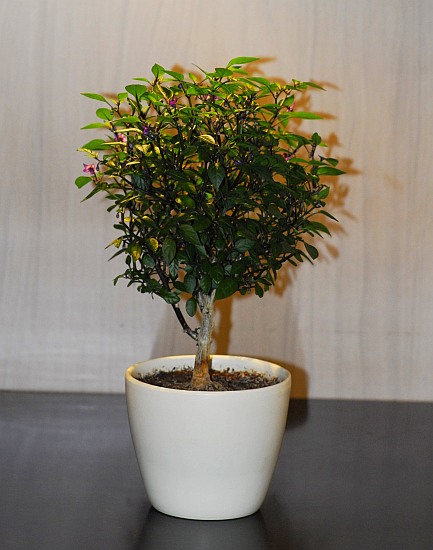
Just cut the plant down and repot it into a small bonsai pot.
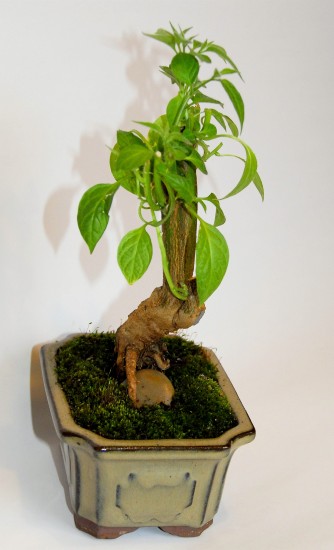
Keep using scissors and small bonsai pot to keep your plant looking like a small tree!
In less than a year, you might already have collected a nice crop and have a great -looking chile bonsai with a thick, woody stem and branches!
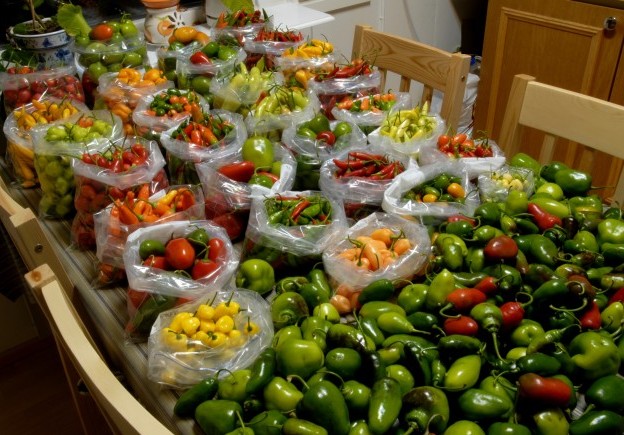
After harvesting your nice crop of your favorite chiles, it's time to start the actual project!
The best way to succeed with bonsai chiles, grow a chile plant in a large pot at first. (Preferably outdoors).
You can also grow your bonchis directly on small pots, but then the resuts of the stems won't be as stunning as by growing the plants large at first.
One of the great things about bonchi-growing is that even if your yield for the season might not be what you expected, you can get plenty of joy from your favorite plants by turning them into bonchis!
You can also turn them back to "normal plants" whenever you want to.
Read on to learn how to create your own bonsai chiles! PotsYou can use virtually any small pots you like, but most traditional bonsai-pots look very, VERY good!
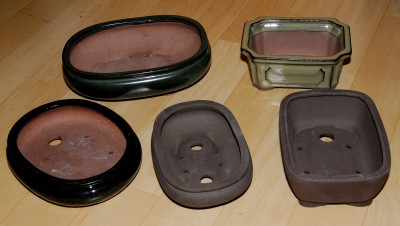
Bonsai-pots I selected for chile bonsais.
Soil Basically, you can use that you would use to grow chiles, but I prefer mild peat-based soil.
As the root space is very limited with bonsai plants, you can use even higher fertilized soil with bonsai-chiles
as the yield isn't the goal in this case.
Akadama is good stuff for maintaining moisture in the soil when growing bonsais.
It's actually pieces of hard clay.
Some brands of cat litter work as a great, much cheaper substitute for akadama.
Bonsai growers often replace the soil completely with akadama, or mix it with the soil.
I just put some akadama on the bottom of the bonsai chiles and use soil on top of it.
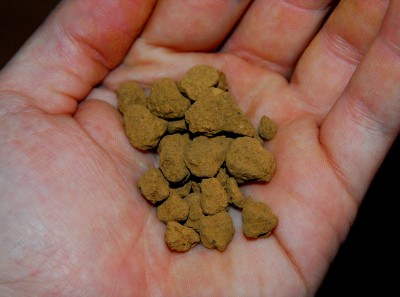
Akadama, used to maintain the moisture in the soil. Great for bonsai growing as the
soil might dry out very quickly!
Tools
Real bonsai-growers use real bonsai tools, but I selected whatever I found useful, and here they are:
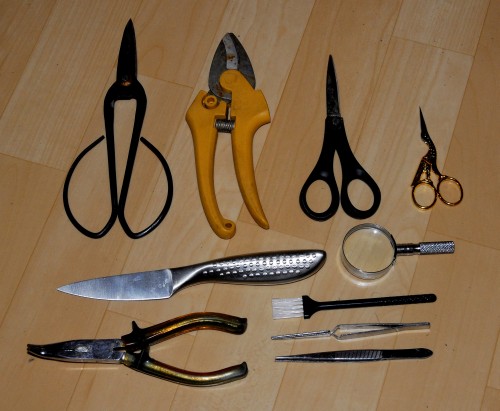
Bonsai scissors and ordinary scissors for cuttings leaves, stems and roots + stem cutters for thicker stems.
Knife, magnifying glass, pliers (with wire cutters), a small "broom" brush (toothbrush can be very handy
for cleaning the roots etc.) and two different tweezers. Remember, the stages below are the most critical part of the whole process. TIP: To make sure your bonsai won't die after the next steps, provide some extra light near the bottom stem for a few weeks before cutting the plant down to encourage the plant to grow some foliage there.
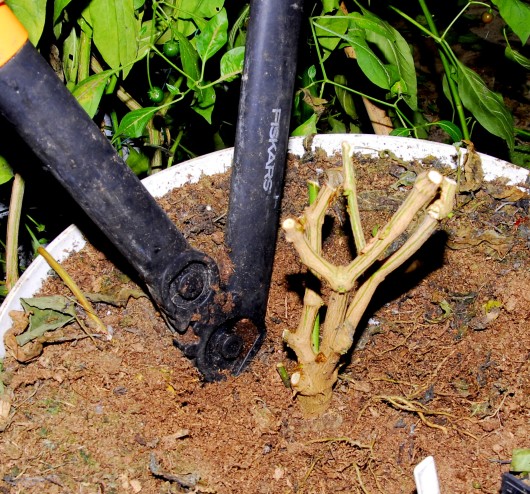
After choosing your favorites to turn into chile bonsais, cut it/them down, preferably the one with the thickest stem(s)!
Remember, after cutting the plants down, their ability to grow thick stems slows down significantly!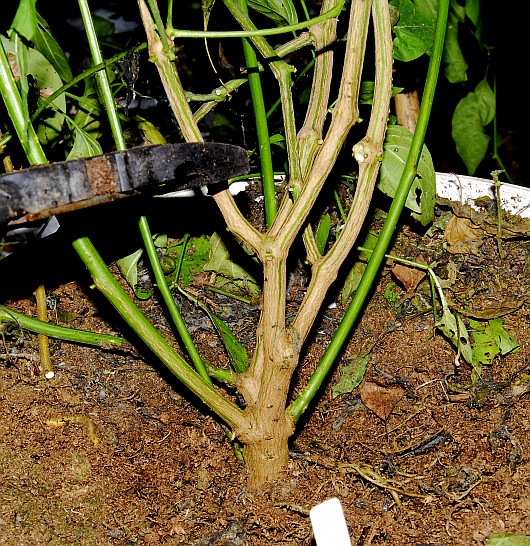
Cutting down the large plant to turn it into a small bonsai plant!
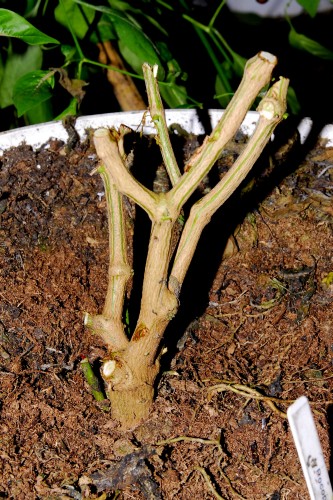
Cutted plant. Doesn't look too good... just yet.
If possible, cut above the leaf-level to make sure your bonsai will continue growing, on the example here, there wasn't any leaves below the cutting point so it's a lot more risky process.
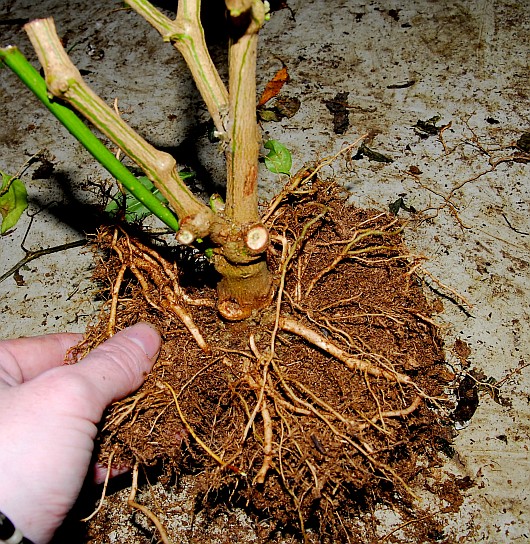
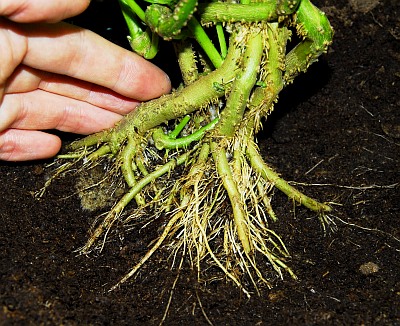
Or, you can trim the plant a little less, and continue the trimming when the plant is forming enough foliage later in the new pot. Then cut off some extra roots around the plant...
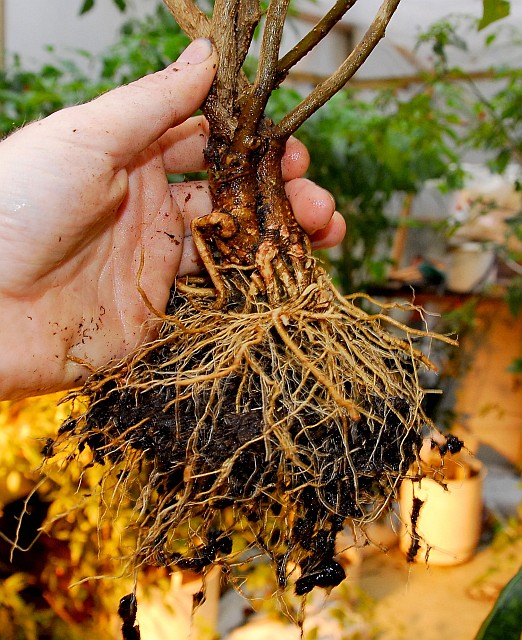
...and dig up the root ball...
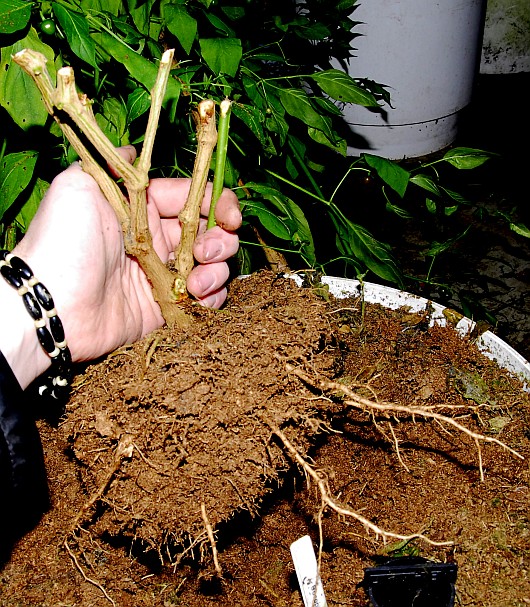
...and cut it small enough to fit in a preferred bonsai-pot.
Trim the plant and the roots even more for the re-potting, if needed.
Then, add soil to the bottom of your bonsai pot.
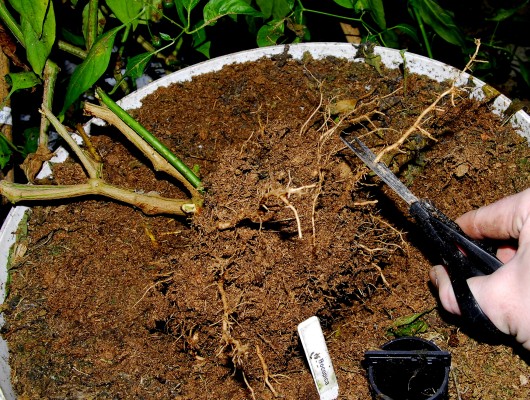
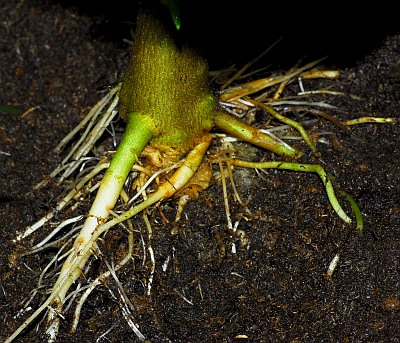
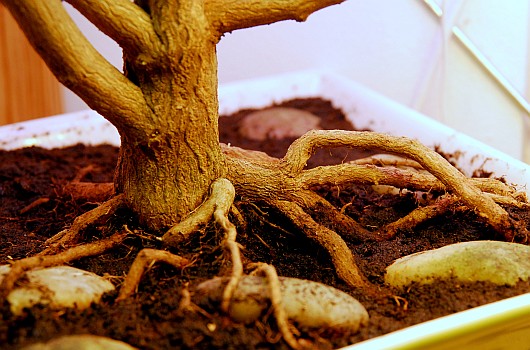
At this point, it's a good idea to clean up the upper parts of the roots from soil...
Removing some soil to make the roots more visible.
...the idea is to leave the largest roots visible above the soil level to make your bonsai chile to look more "dramatic".
You can enhance this process by encouraging the woody root growth by exposing the largest roots for the light after in the middle of the growing season, preferably many months before cutting them down.
A few stem examples shown here from few of my full-sized plants:
(Keep in mind these will still grow for months before I will cut them down...)
Praetermissum growing on hydroponic system.
One great way to produce very massive stems quickly is to "fuse" the stems together...
This works with some varieties, for example, some rocotos (C. pubescens) and most C. baccatums are great for this!
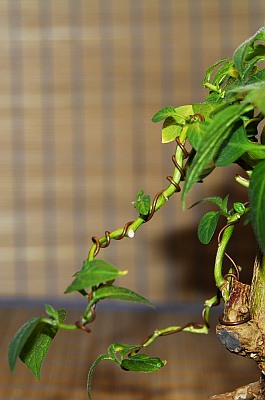
Anyway, here's one project I made by twisting several seedlings together when they were still small.
You can do this also with cuttings!
Hopefully,they will blend together nicely later.
In any case, these projects will look very good after cutting them down and reshaping them! :) 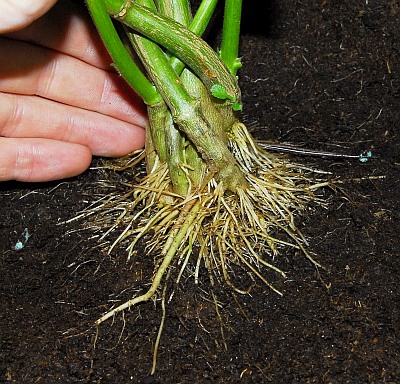
Fusing stems.
Another project of fusing stems.
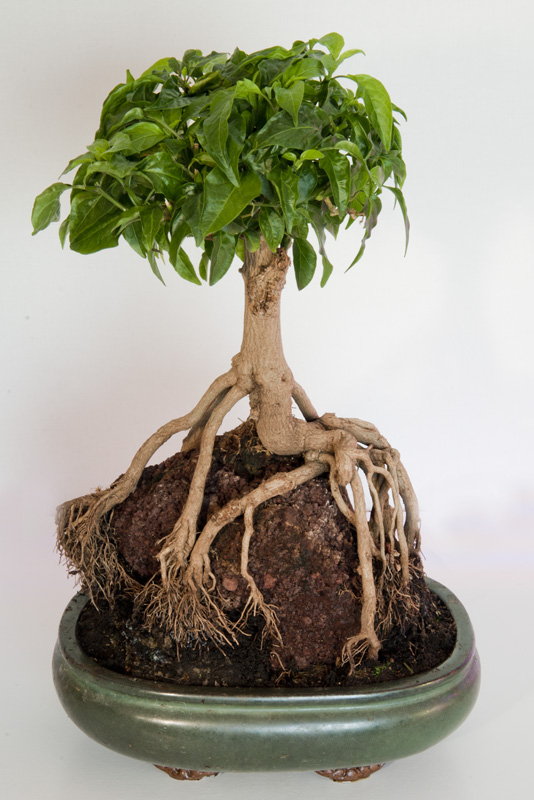
One great methods with Bonchi`s is to place a stone under the roots and months later when the stem(s) are thicker and roots have wrapped around the stone, it`s possible to repot the Bonchi stem with the stone into bonsai pot!
Here`s one simplified project as an example:
Plants taken, wrapped together and wired (more about wiring a little later on this article), ready to be repotted with a stone!
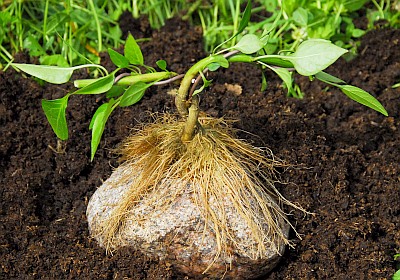
Placed on a stone, next step would be to repot the plant with a stone.
You can choose to use either soil or hydroponics, I used soil in this example.
After several months of growing, the plant will be pruned down and planted into a bonsai pot!
Okay, here's another "roots-on-a-stone" Bonchi example:
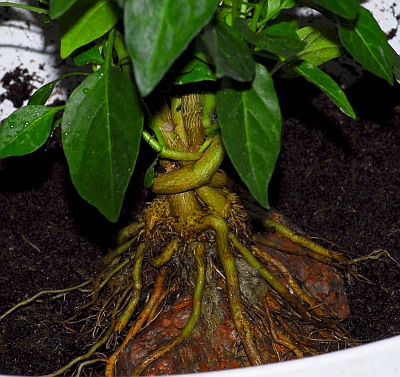
Roots on a stone, notest many stems I think they will at least partially fuse together.
Here`s the same plant, overview:
Keep in mind that this plant will be cut down from near the stem.
I might try to wire some branches soon to make much nicer structure, updates about that
later
Many stems growing on a stem.
At the end of the season, this plant will be cut down and repotted into a bonsai pot.
The idea is to make the stone very visible.
Here's another example about fusing stems, with results:
Two C. rhomboideum seedlings grown together, start to fuse.
Here's the same plant cutted down, wired, showing some signs of life!
And the same plant year later, fused together nicely.
Still waiting for some fusing to occur.
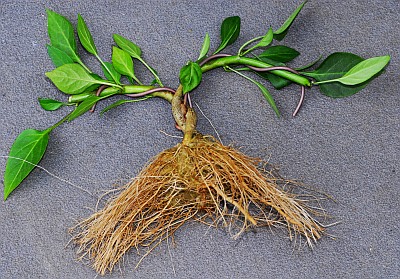
Ok, let`s get back to the project! Cut off most of the smallest roots from the upper part of the chile roots... you can trim it even more after the chile bonsai has been planted to it's new home.
This operation makes your bonsai chile look more like a small tree than a small chile plant.
A nice bonsai pot is highly recommended for the best looks! 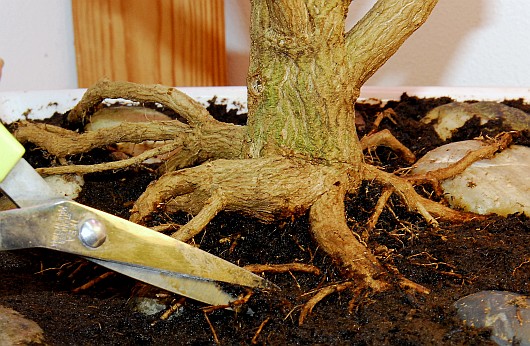
Trimming roots. Just leave the larger ones to show above the soil level to make it look better.
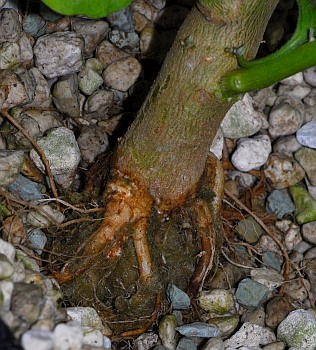
And then, plant your chile bonsai into it's new bonsai-pot. Add some soil on the sides and around the stem and roots the way you want it.

Designing the base for the bonsai.
Place the bonsai-stem (with not-too-much-foliage appearance at this point) on a sunny windowsill,
or for example under a fluorescent tube or bulb!
Light is the key for a new vigorous growth!
Keep in mind that as the enviroment and circumstances changed suddenly a LOT.
It might take a little while for your chile bonsai to grow some new roots and after that, hopefully some new foliage too!
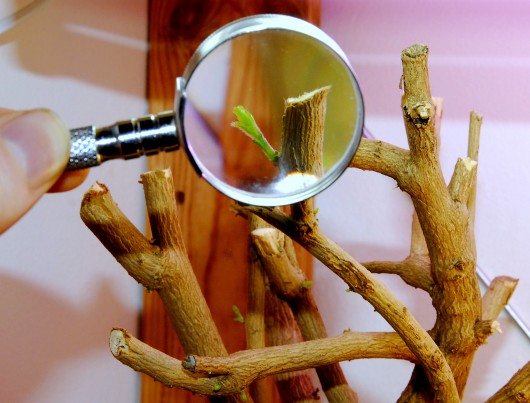
Finally! Some new growth!
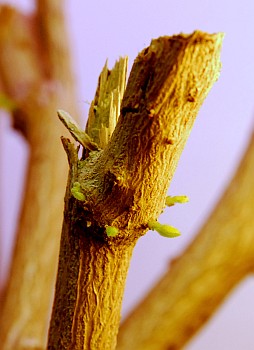
Many growing points emerging from the woody stem!
Keep pruning the new growth (both stems and leaves) whenever needed to keep your bonsai plant pretty!
At this point, it's a good idea to trim the new growth a lot to make the foliage even more bushy!
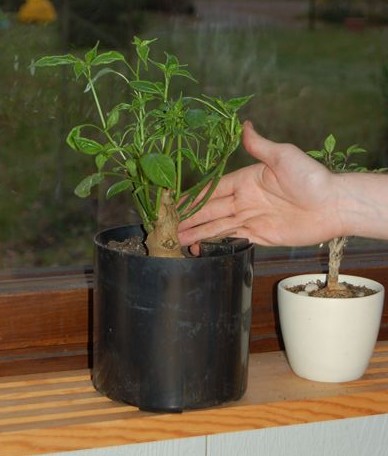
This plant was germinated about 10 months ago, it was 2 meter in height before cutting it down completely.
Also remember that sometimes it's a good (especially at the beginning), to keep pruning the plant a bit more that what you would think at first.
It takes some practice to master a technique for getting some pretty tree-looking bonsai chiles, but a decent amount of light, good care, patience and experience will do that automatically. :)
CAP 1546 (C. annuum) in a small pot.
This plant was soon transferred into a shallow bonsai pot.
After a few weeks of growing some roots, add some growing fertilizer to boost the growth and still, keep pruning the plant all the time, just as you want it!
When it's a bonsai chile we're speaking, the foliage should be very dense altough it can be minimal, just avoid spindly growth.
In other words, cut the growth when it's getting too spindly and it'll start branching.
In larger pots, chiles won't need too much fertilizing, but with bonsai chiles, the plant will consume the nutrients very quickly, so make sure to add some fertilizer (like NPK 1-1-1) every once in a while.
I prefer using Biobizz products for both, fruit production & bonsais.
I've had a great results with a combination of next biobizz products:
BioGro, BioBloom, Alg-a-mic and BioHeaven, if more flowers pods wanted, add TopMax also.
When you're sure your bonsai is making some new growth, you can start decorating the surroundings of your bonsai chile, just to make sure you won't decorate a dead plant.
Just use you imagination!
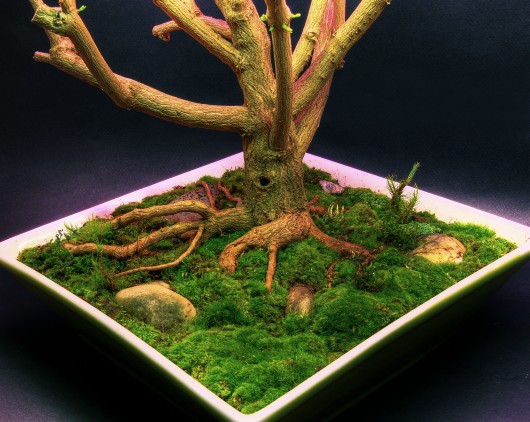
I like to make the chile plants look like a miniatyre trees.
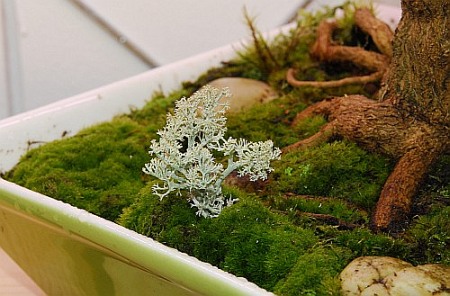
Use stones, moss, lichens, pieces of wood, sand... just about anything you can think of to make your chile bonsai look as cool as possible!

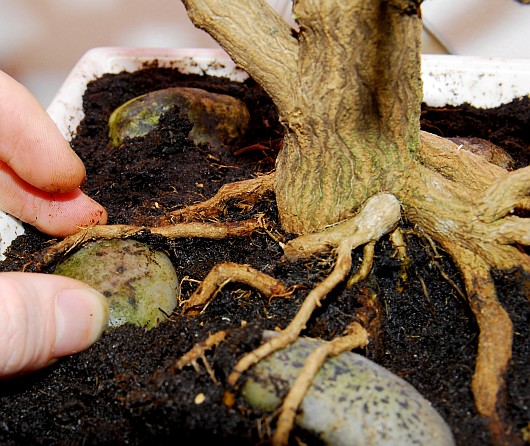
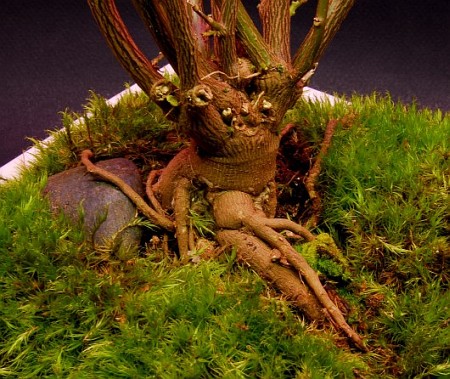
Assembling some stones under the roots.
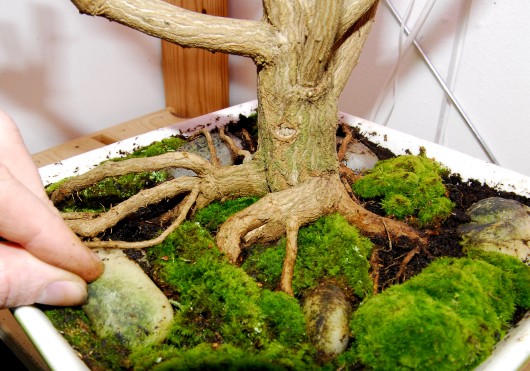
Adding some moss and few more stones. Still need to patch up some spots and add some details like small shrubs and weeds.
Also that hole in the stem needs some blackening, drilling it a little deeper would do the trick, but for now, I'll just use a black pen. :)
It's all about the details!
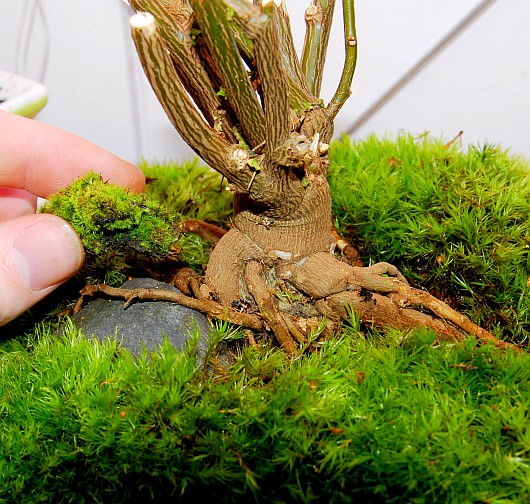
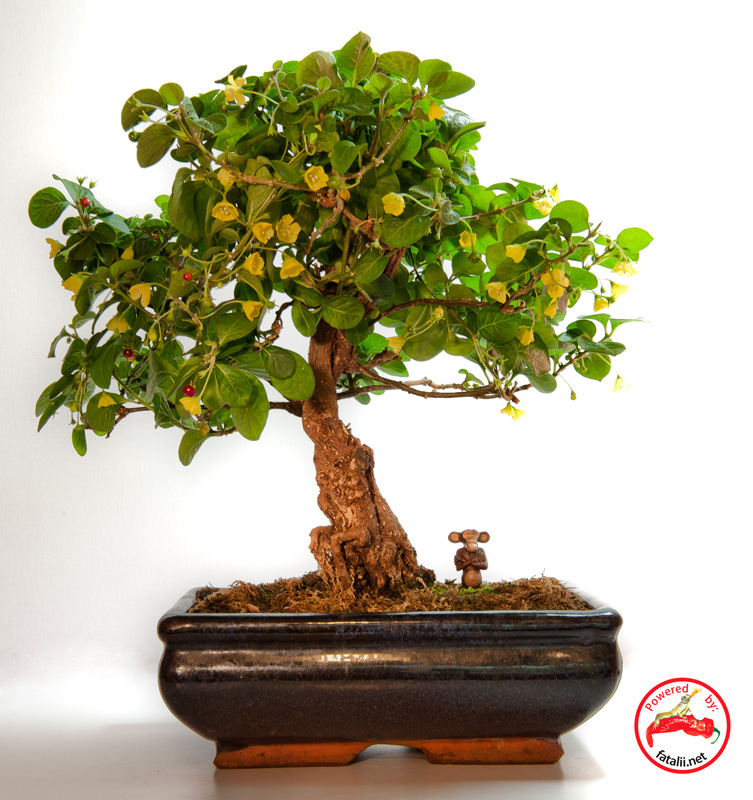
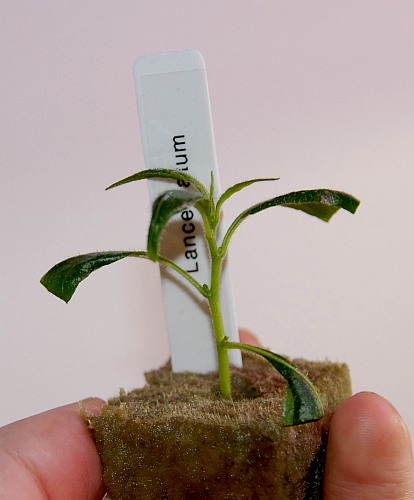
Decorating C. lanceolatum bonsai.
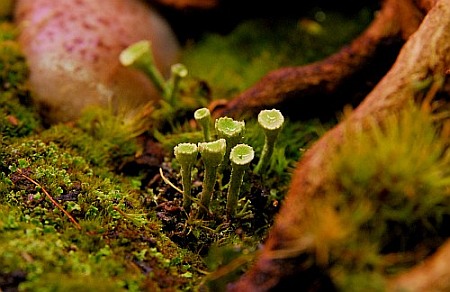
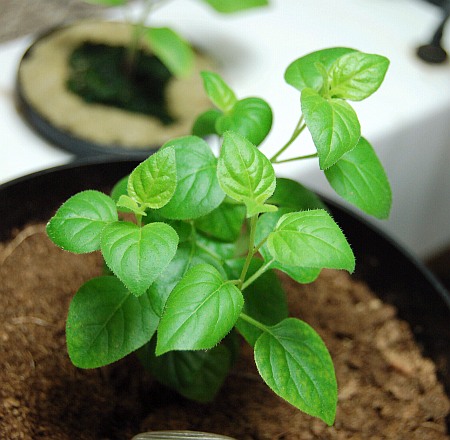
It's even possible to make a moss grow on the soil of your bonsai plants.
You can grow some moss in a container for around-the-year-use.
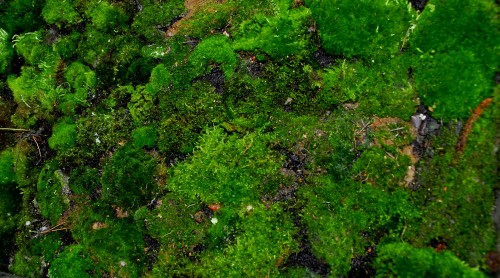
Moss growing in a container.
One technique is to mix minced moss, sour milk and coffee and then use a paintbrush to spread it wherever you want the moss to grow, on soil, stones and even roots.
A decorated bonsai plant. Some new growth can be seen on the branches!
Notest the colored black hole he stem. :)
Click the picture for larger zooming!
Some decorating examples here:
Wiring
I got plenty of emails asking about wiring so I decided to show how simple it actually is.
The basic idea of wiring is to bend the stems and branches just the way you want them.
To make the Bonchi`s look "real trees", you should try to bend the branches down, as older trees tend to do.
Keep in mind that this is only a tip, there are NO RULES with Bonchi`s! :)
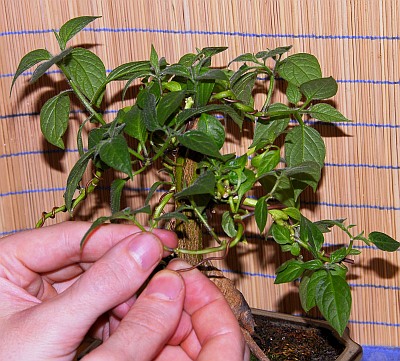
Here's the starting point with this rocoto plant (no wiring done yet):
Rocoto Bonchi before wiring...
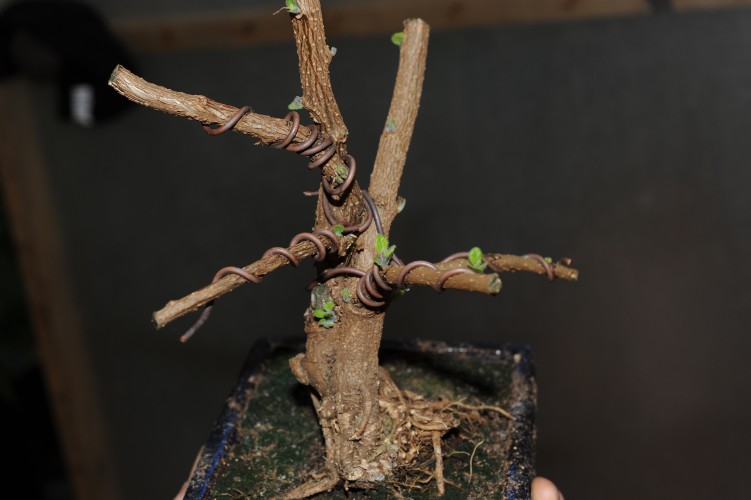
This picture illustrates how the wiring is done.
Choose different kinds of bonsai wires to wire both stiff and loose branches.
Remember that some varieties break very easily so be careful!
A good idea is to test how fragile the plant actually is by bending some extra brances first.
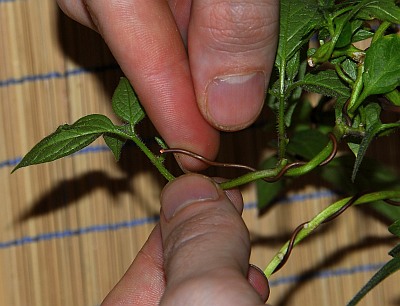
Wiring a rocoto branch.
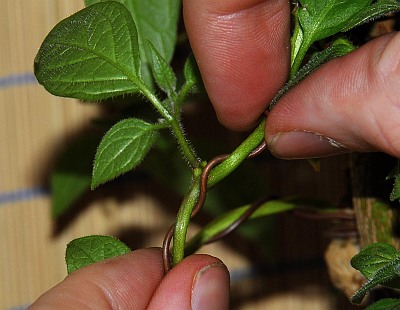
Then, you need to carefully bend the branch with the wire.
Apply more wire to place where you need most bending.
You can also twist the branch carefully after wiring it.
Just bend it like you want it.
There might be some "bald" spots on the branch, don`t worry, new growth will emerge there quite soon!
Bonchi`s tend to be very vigorous!
Okay, here`s the bent branch on this rocoto I used as an example.
Notest there is an extra branch on top which I'd like to remove for better looks in a long run.

A wired rocoto branch.
At this point the plant looks like this:
(Notest the same extra branch I just mentioned on top right.

Rocoto Bonchi after wiring.
Ok, time to pinch off the ugly branch on the top.
It might look kinda cool but trust me,
this plant will look much better later when the brach is cut down as it
would shade the wired branch and it wouldn`t be filled with tiny leaves later on.
Wired branch with top branch removed.
Then, it's time to pinch off the largest leaves from the rocoto Bonchi.
This might make it look a bit ugly at first, but after few weeks with added fertilizer and plenty of light,
It will definitely look much better than before.
In order to get a beautiful Bonchi plant, you need to make it ugly at first. 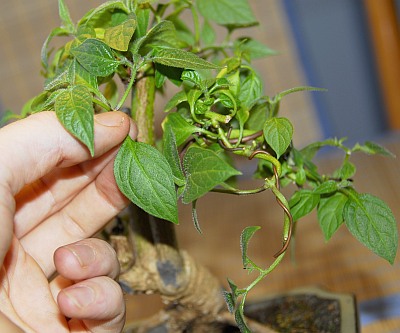
Removing large leaves.
Removed most of the large leaves.
After removing most of the large leaves, let the plant grow a little,
progressively pinching off the new large leaves that will emerge.
A little later, this Bonchi will look just wonderful.
Apply more wiring when needed.
You can remove the wires when the branches have settled and in some cases,
after they`ve became woody.
Few more examples about wiring and trimming here:
C. lanceolatum in a bad shape after a while left on it`s own.
Same plant immediately after wiring.
Still need to continue pinching off the large leaves .
Needs also a little trimming, but eventually, it will look very good again.
Another example, Dutch-Habanero.
It looks kinda good at first too, but I need to prune and wire it to get better looks for it to produce some yield.
Bonchi yield pics coming here later!
And here it`s wired and most big leaves removed.
Will look much, much better with more leaves, flowers and pods hanging there!
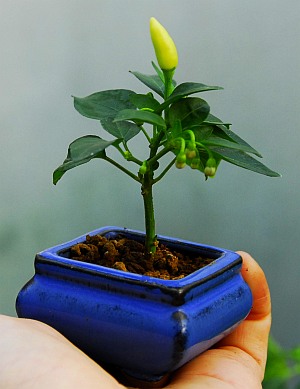
Finally, This example isn`t a Bonchi with a woody stem,
but it shows what you can achieve very quickly with a cutting and a tiny pot:
Many people have asked about growing Bonchi plants directly in a bonsai pots.
You can do that, but keep in mind that the whole idea is to grow as large plants (or just thick stems) as possible.
And that doesn't happen quickly in a small pot.
That`s why I highly recommend growing chile plants normally at first.
Even when your plants are not in time to produce any yield, you can cut them down into Bonchi-shape.
Then grow them as ornamental Bonchi`s all winter long.
And after the winter, repot them into large pots and you`ll be very early for that season!
GO FOR IT, IT`S FUN AND DEFINITELY WORTH TRYING!
And finally, few pics to show how fast chile plants will grow very thick stems:
C. lanceolatum cutting 28th of march 2007
Same plant, 22th november, 2007, less than 8 months old!
CGN 19198 (C. sp) germinated 1 month before the pic. (pic was taken 14th april, 2006)
Same plant, 22th of november, 2007, 1 year 7 months old plant.
Just think how it'll look after few more years. :)
Good luck with your chile bonsai growing!
Some more bonsai pics:
Ulupica Large -Bonchi.
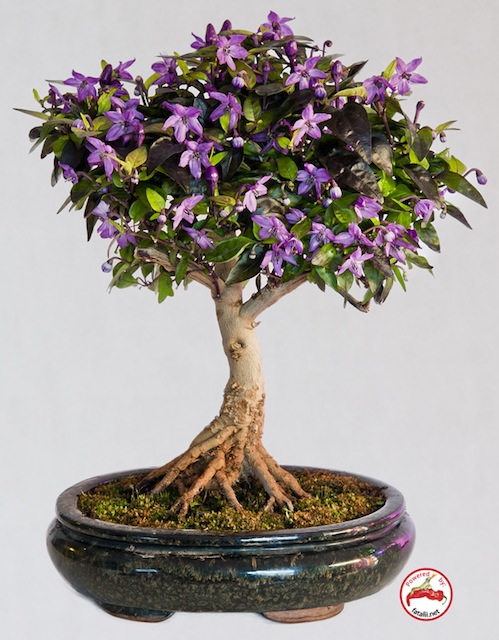
Bolivian Rainbow -bonchi flowering.
Bird's Eye Baby -bonchi.
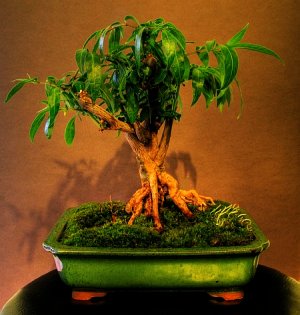
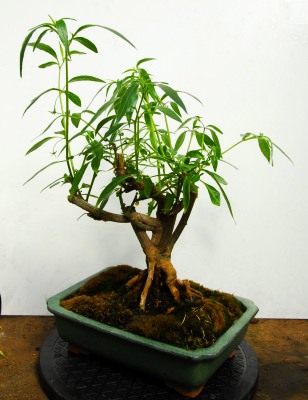
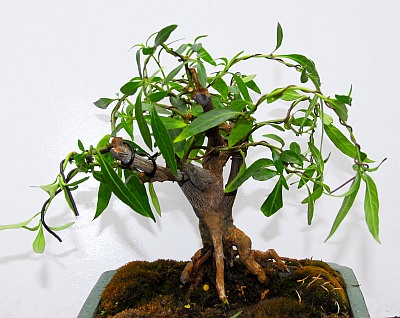
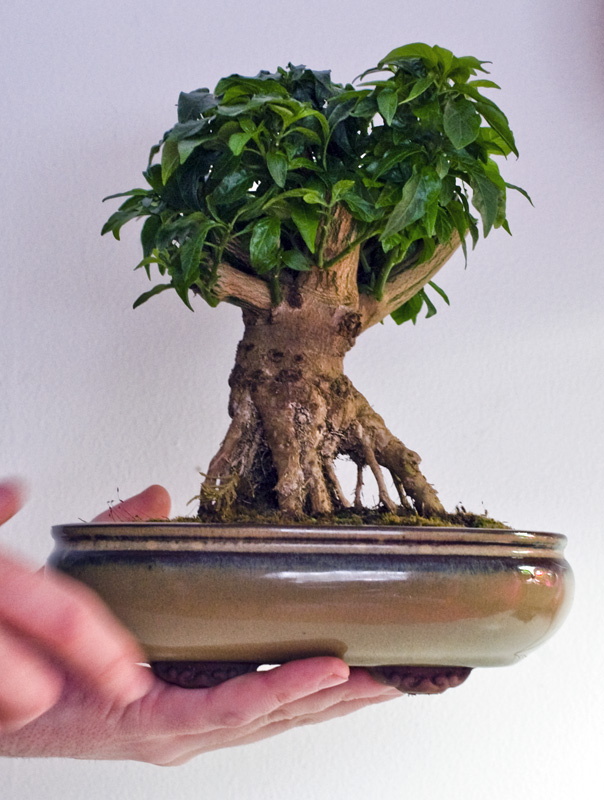
C. lanceolatum.
Less than one year old on this picture!
Arriba a Saia -bonchi.
Tepin, Sonoran -bonchi.
Some ornamental annuums ready to be moved into bonsai pots!

CAP 1546 (C. annuum) -bonsai flowering.
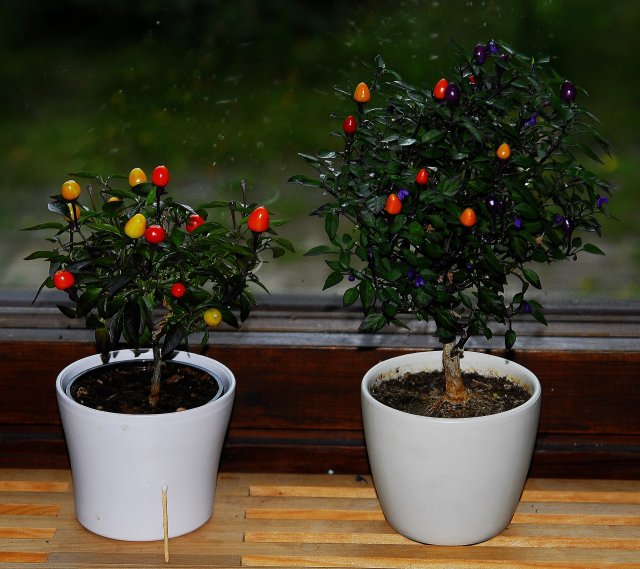
And then, I wanted to show you how different results it's possible to get with a same variety:
Tepin,National Park of Tikal, Guatemala -bonchi.
This is the same variety as above,
Tepin,National Park of Tikal, Guatemala.
So you can have your bonchi's exactly how you want them.
Если вы заметили ошибку, выделите необходимый текст и нажмите Ctrl+Enter, чтобы сообщить об этом редакции
Полезные статьи
сад в тени Масляная лампа из труб ФЛОРАРИУМ, ТЕРРАРИУМ из лампы Горелка для дачи и отдыха (Спиртовка) еще раз баночка | 